Using VS Code To Build An Azure Function And SQL Database App With .Net Core On Azure Cloud
I really like Microsoft’s strategy in recent years, it makes development easier by using VS Code, .Net Core, and Azure cloud. This post details the process of developing an Azure function and SQL Database app using .net core with VS Code on a Mac laptop and deploying it to the Azure cloud.
At the end of this post, you can find the repo link of the sample project.
The Extensions for VS Code
The first thing we should do is to set up our development environment, that is, the VS code. Therefore, you should install these two extensions: Azure Functions Extension and NuGet Package Manager.
With the help of Azure Functions Extension, we can quickly create, debug, manage, and deploy serverless apps directly from VS Code.
Since we will use .Net Core 3.1 and dependency injection in our .NET Azure Functions app, therefore, we need some extra Nuget packages.
Dependency Injection And the EntityFramework Core
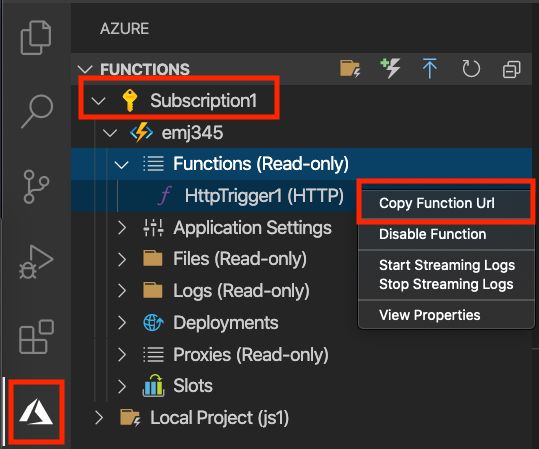
After installing these extensions in VS Code, then we should create the Azure Functions project via the Azure Functions Extension.
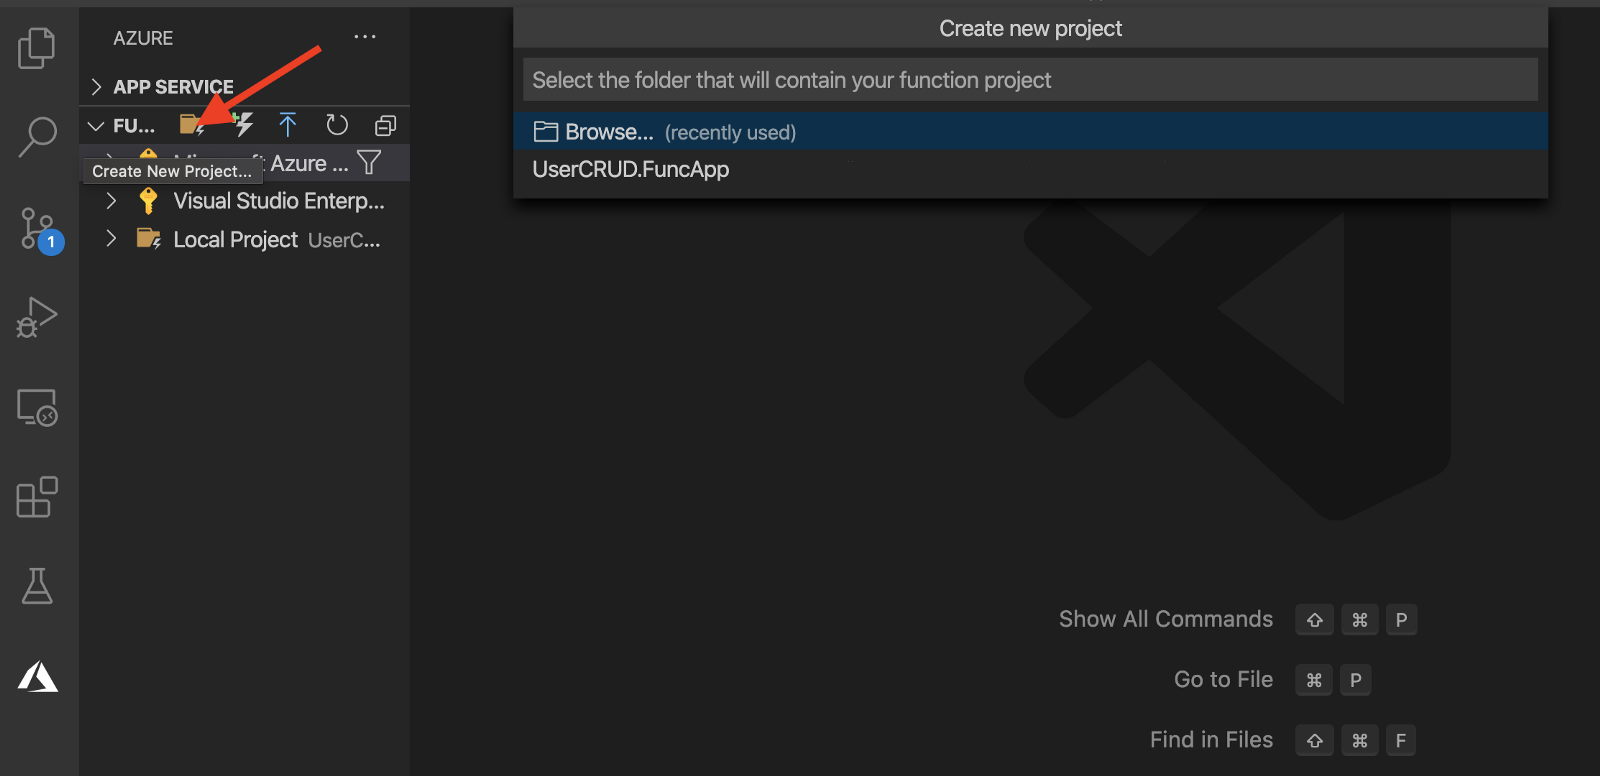
By using the Azure Functions Extension, you can select the programming language you use and the template of the function. Now we set up our project.
Since Azure Functions 2.x., Azure Functions support the dependency injection and the dependency injection in Azure Functions is built on the .NET Core dependency injection features.
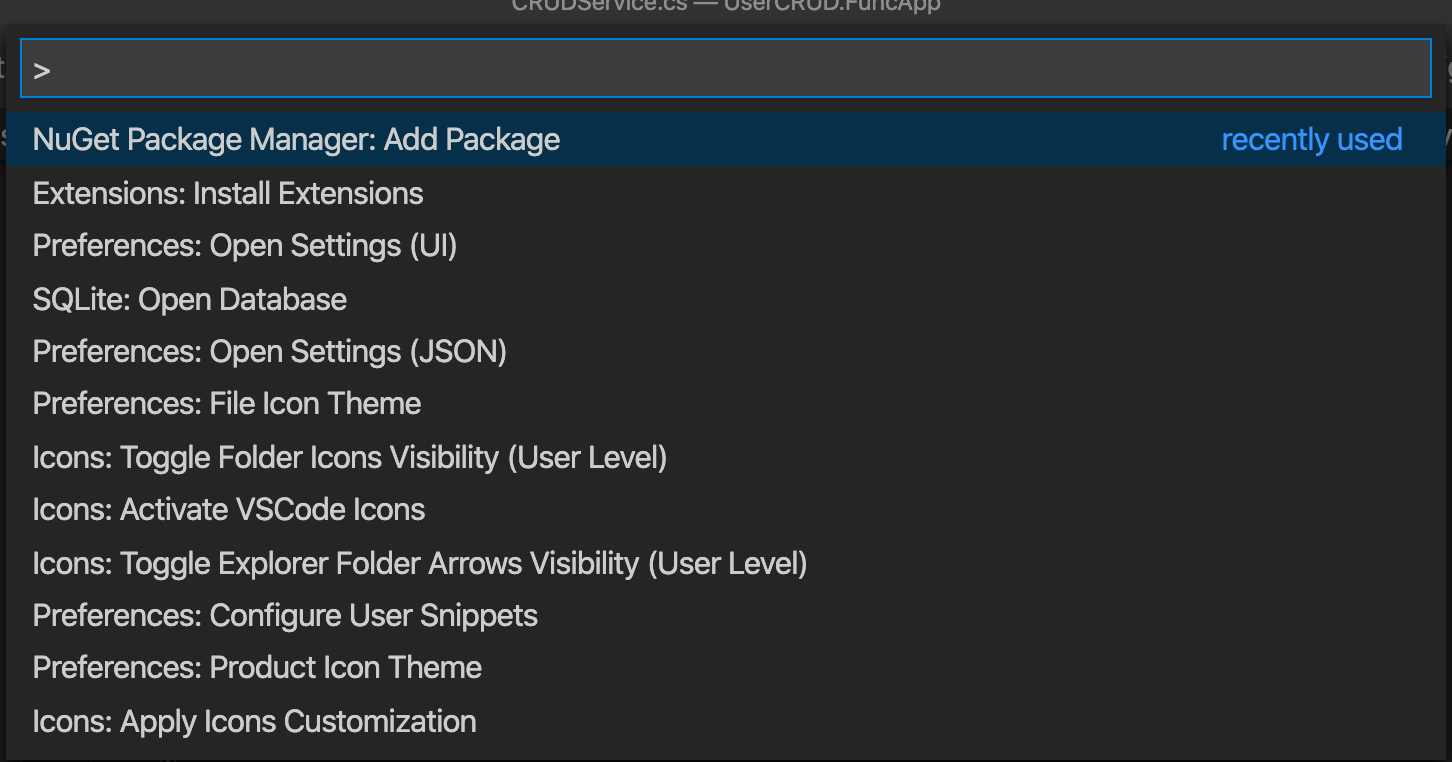
In order to use dependency injection, we must install two Nuget packages:
- Microsoft.Azure.Functions.Extensions
- Microsoft.NET.Sdk.Functions
So, we could use the NuGet Package Manager Extension we installed to add them.
After installing these packages via NuGet Package Manager, you can find the referenced items are added at the .csproj file in the project folder.

Now we can create the Startup class and configure the services required in the Configure method(unlike the Asp.Net Core project, it is not in the ConfigureServices method.)
[assembly: FunctionsStartup(typeof(UserCRUD.FuncApp.Startup))]
namespace UserCRUD.FuncApp
{
    public class Startup : FunctionsStartup
    {
        public override void Configure(IFunctionsHostBuilder builder)
        {
            var connectionString =
                Environment.GetEnvironmentVariable("SqlServerConnection");
            builder.Services.AddDbContext<DataContext>(x =>
            {
                x.UseSqlServer(connectionString
                , options=>options.EnableRetryOnFailure());
            });
builder.Services.AddTransient<ICRUDService, CRUDService>();
        }
    }
}
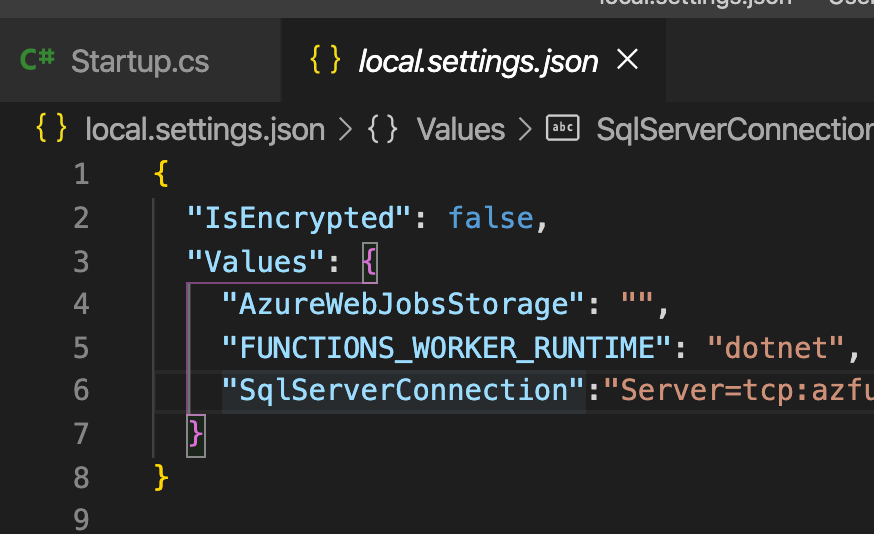
As you can see in the code above, we get the SqlServerConnection string from the environment variables, and this value can be set in the local.settings.json file for local testing and can be set in the Azure Functions panel for public access.
Another point worth noting is that we add the FunctionsStartup assembly attribute to specify the type name used during startup.
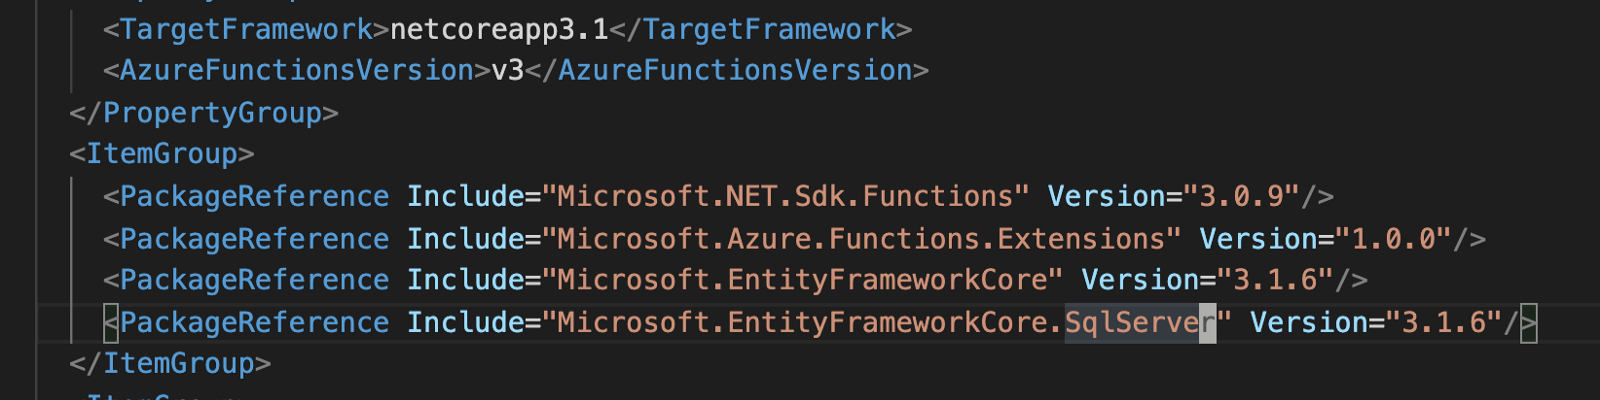
Next, we will introduce the EntityFramework Core into our app. Since we are using .Net Core 3.1, it should be noted that starting in 3.0, the ASP.NET Core shared framework doesn’t include EF Core or any EF Core data providers. Therefore, we should add these packages(the EF Core and the SqlServer provider) via the Nuget Package Manager.
- Microsoft.EntityFrameworkCore
- Microsoft.EntityFrameworkCore.SqlServer
Now we got all the packages required by our app.
The code logic is relatively simple, the following is an example of the function to show all the user entities in our database.
namespace UserCRUD.Function
{
    public class ListHttpTrigger
    {
        private ICRUDService _service;
        public ListHttpTrigger(ICRUDService service)
        {
            _service = service;
        }
[FunctionName("list")]
        public async Task<IActionResult> Run(
            [HttpTrigger(AuthorizationLevel.Anonymous, "get", Route = "list")] HttpRequest req,
            ILogger log)
        {
            var user = await _service.ListAsync();
            return new OkObjectResult(user);
        }
    }
}
As you can see in the above code, we are using constructor injection to inject the ICRUDService service into the HTTP-triggered function. And the service uses EF Core to read users list from our database.
However, so far, we have not set up our Azure SQL Database. Next, we will set up the Azure SQL Database and connect our function app with the database.
Set Up The Azure SQL Database
Now let’s create the Azure SQL Database service on the Azure cloud platform. But before creating a new resource we should create a resource group first. you can read more about the reason at: CI/CD For Python Code Using Azure, Jenkins, Nginx, and GitHub: Part One
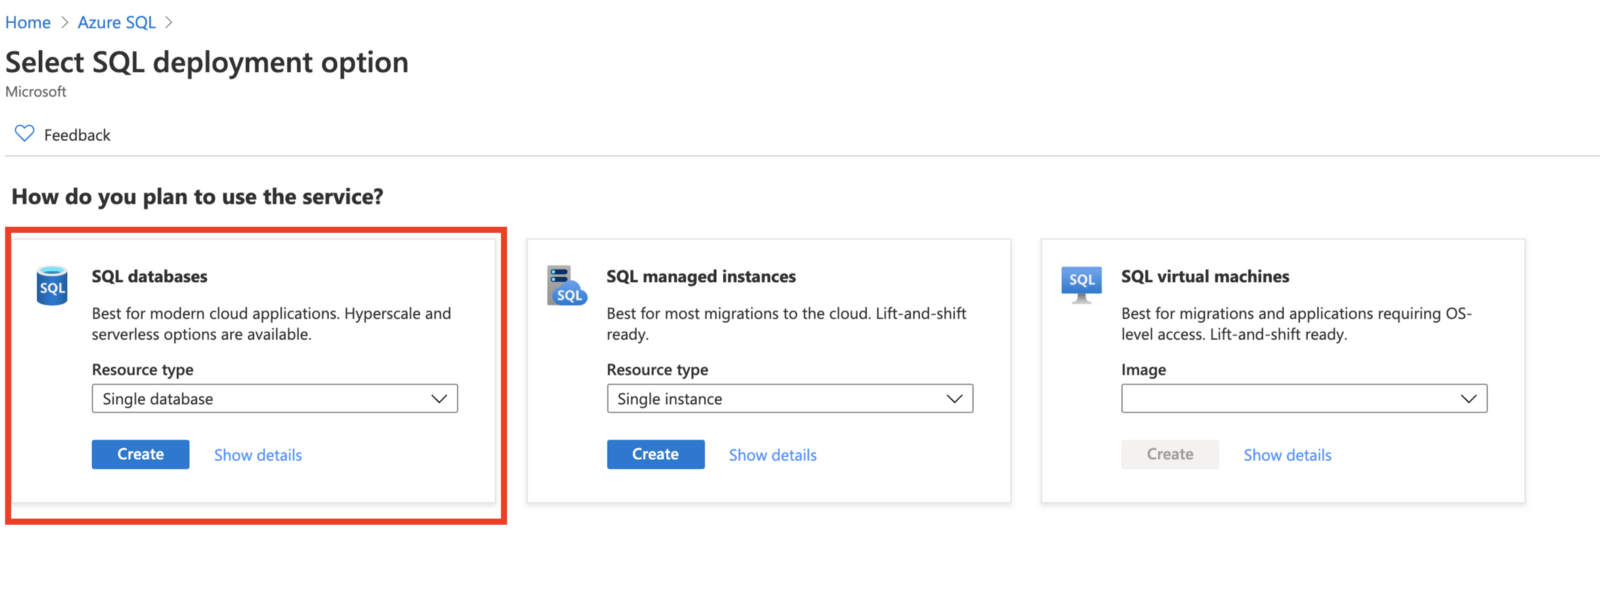
Then you can find the Create a resource button at the Azure portal and create an Azure SQL service. The SQL deployment option should be SQL databases.
After creating the Azure SQL database service, we should configure the database for our serverless function app.
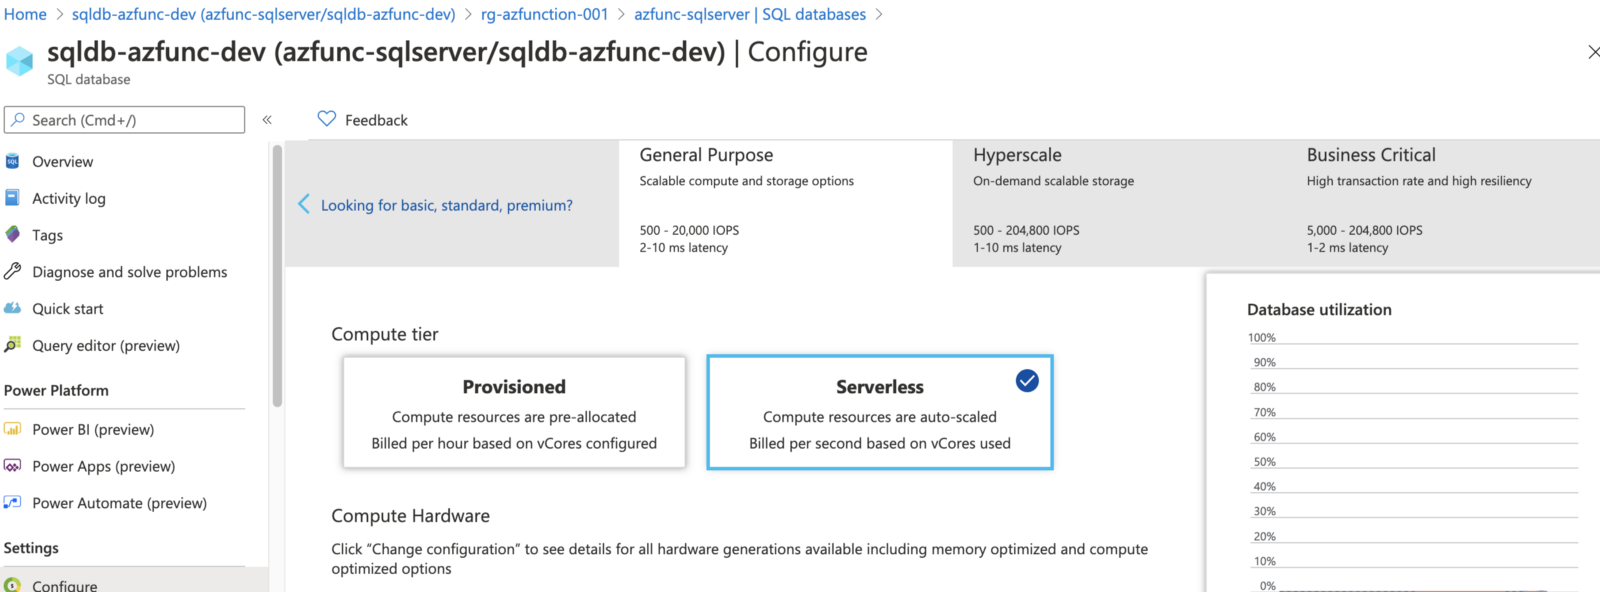
The first one is the Compute tier of our database, you can find it at the Settings/Configure section. We select the Serverless tier which means compute resources are auto-scaled billed per second based on vCores used.
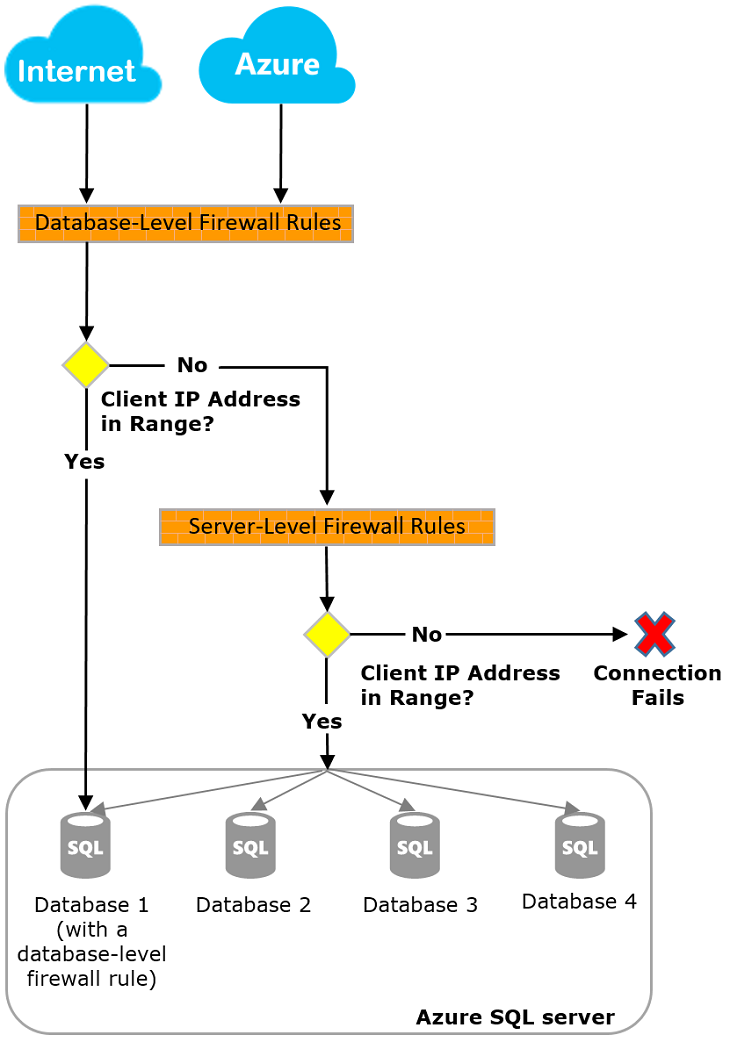
The second one is the Firewall settings of our database. This is because connection attempts from the internet and Azure must pass through the firewall before they reach our server or database. And there is a diagram from Microsoft that shows the flow.
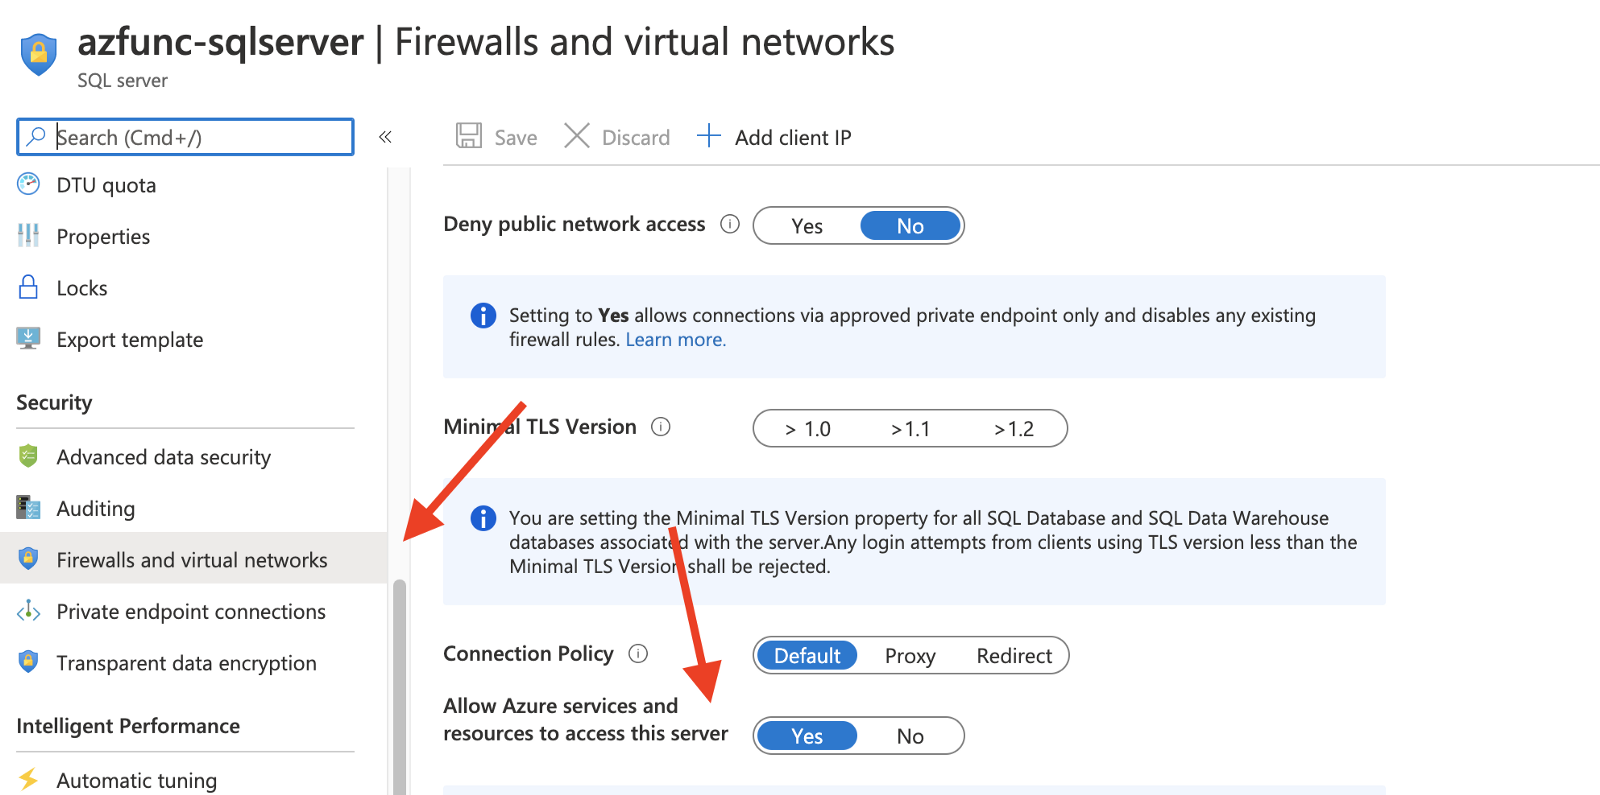
You can find the Firewalls and virtual networks button at the Security section of the SQL Server. And we just set Allow Azure services and resources to access this server.
The third thing is that we should create a table that will be used for our Azure Functions app.

For the sake of creating a table in our database, we can use the Query editor to open an editor to create the table using SQL.
Now we’ve set up our Azure database on the Azure cloud platform.
Run It Locally And Publish It To Azure Cloud
As I said in the Dependency Injection And the EntityFramework Core section, we can set the database connection string in the local.settings.json file for local testing and in the Azure Functions panel for public access.
Therefore, before we can run our app locally or publish it to the public, the first thing we should do is to get the connection string from our database.
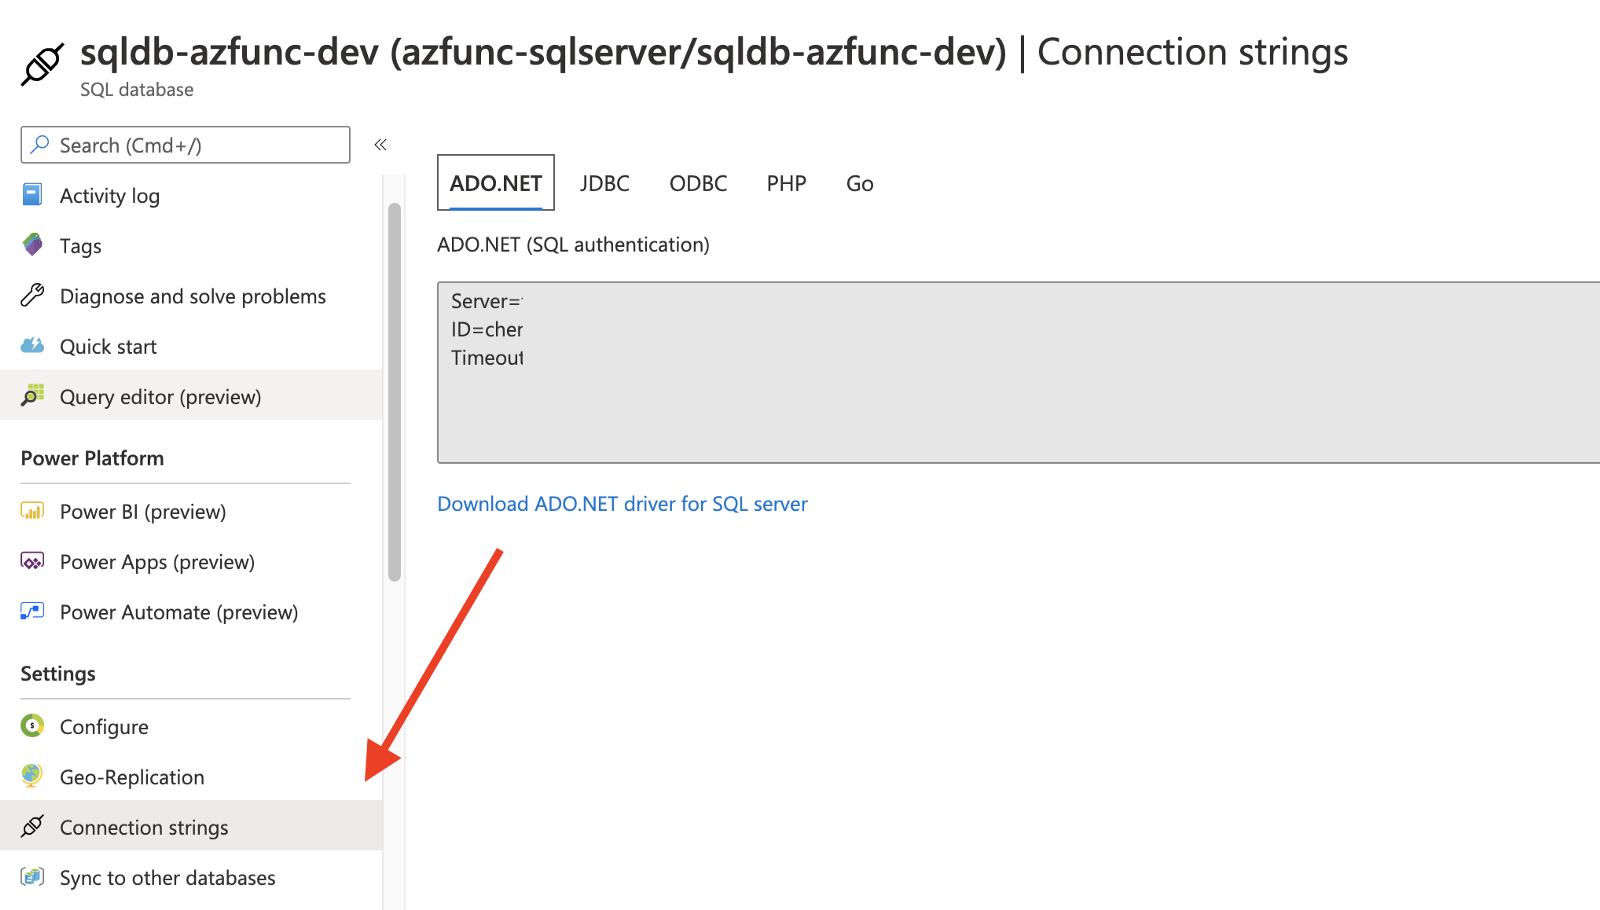
And we copy and paste the connection string to Values collection in the local.settings.json file in our project. This is because when developing locally, app settings come from the Values collection in the file.
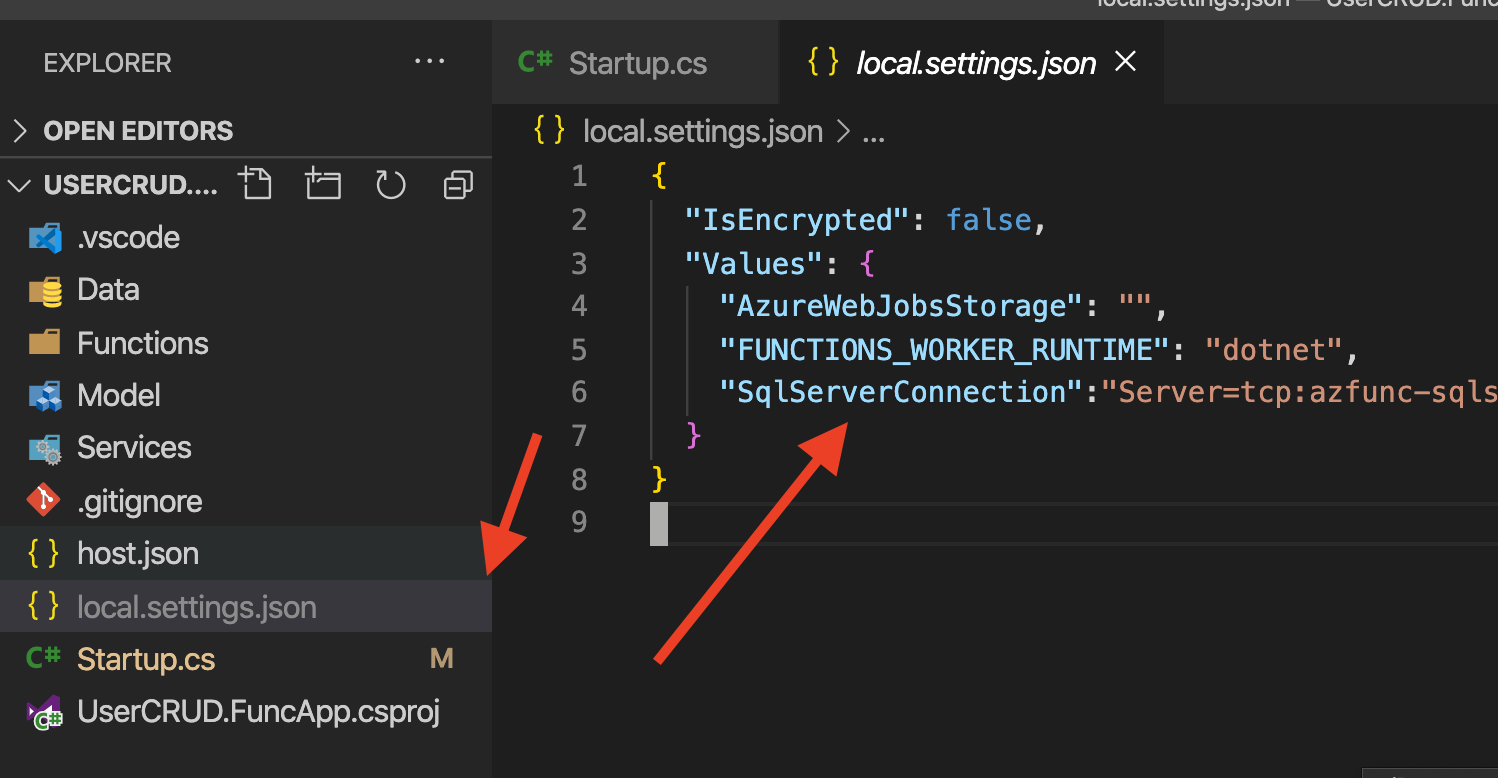
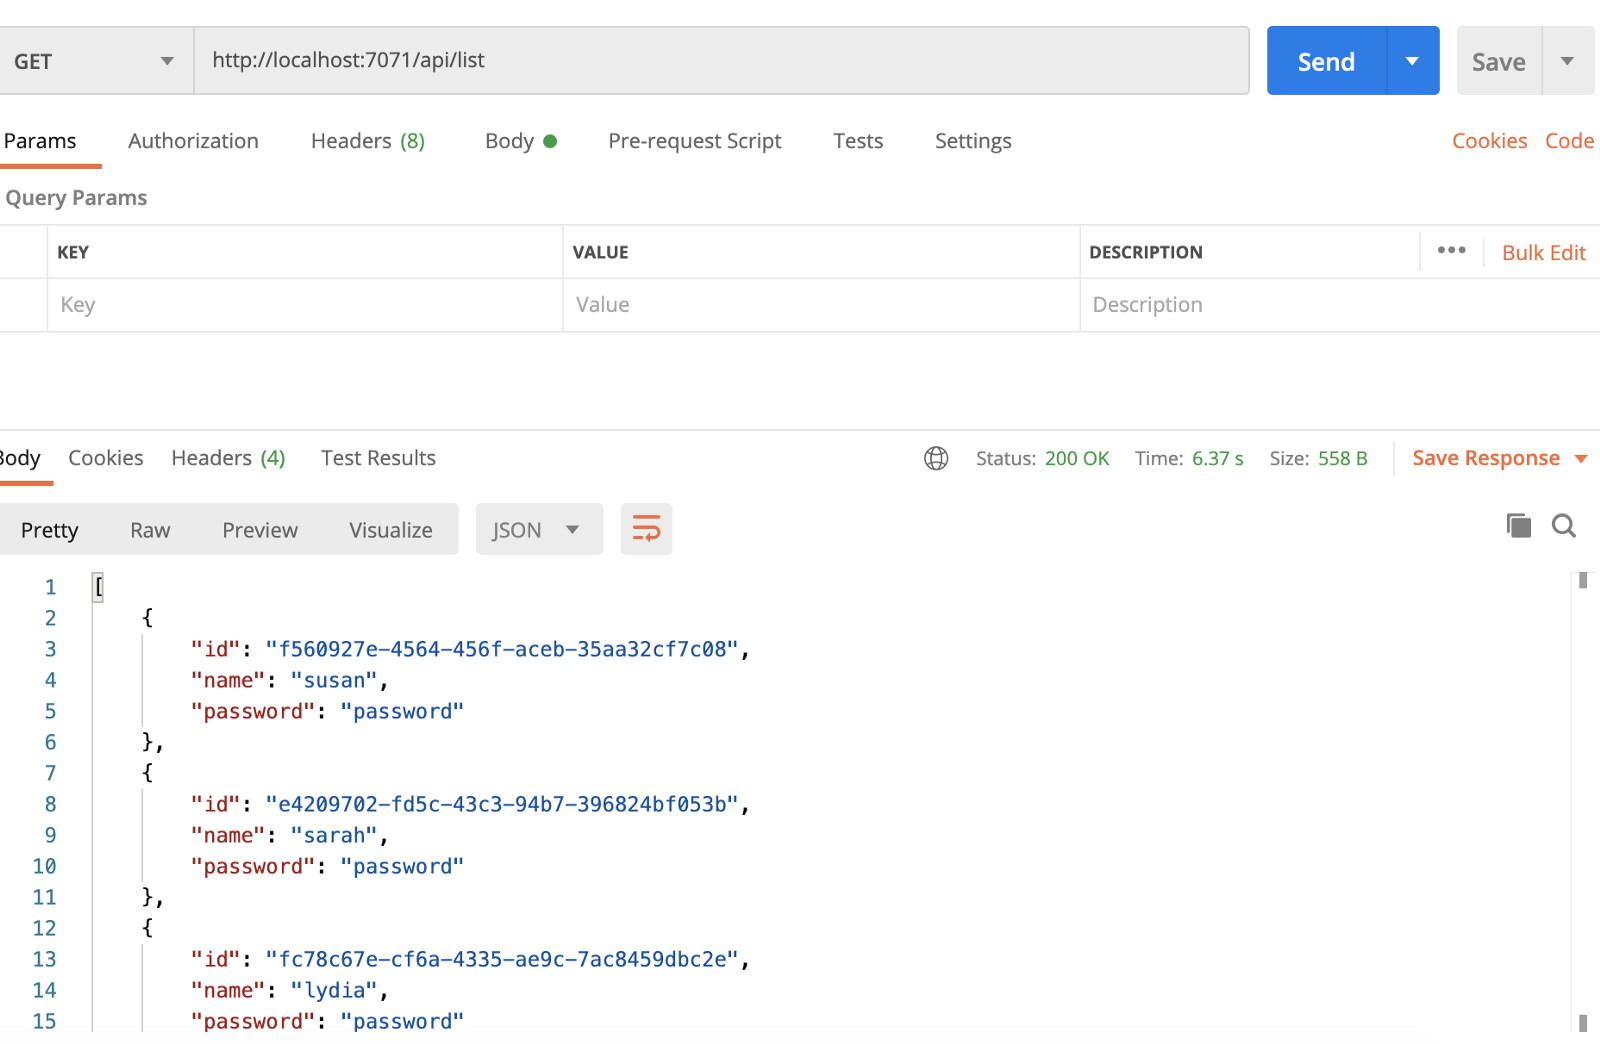
And as you can see, this file is only used for local testing and it’s not included in git version control. Now with the VS Code Azure Function Extension, we can run it locally.
And we can use the Postman to send a GET request to the localhost( http://localhost:7071/api/list ) to retrieve the users list I created before.
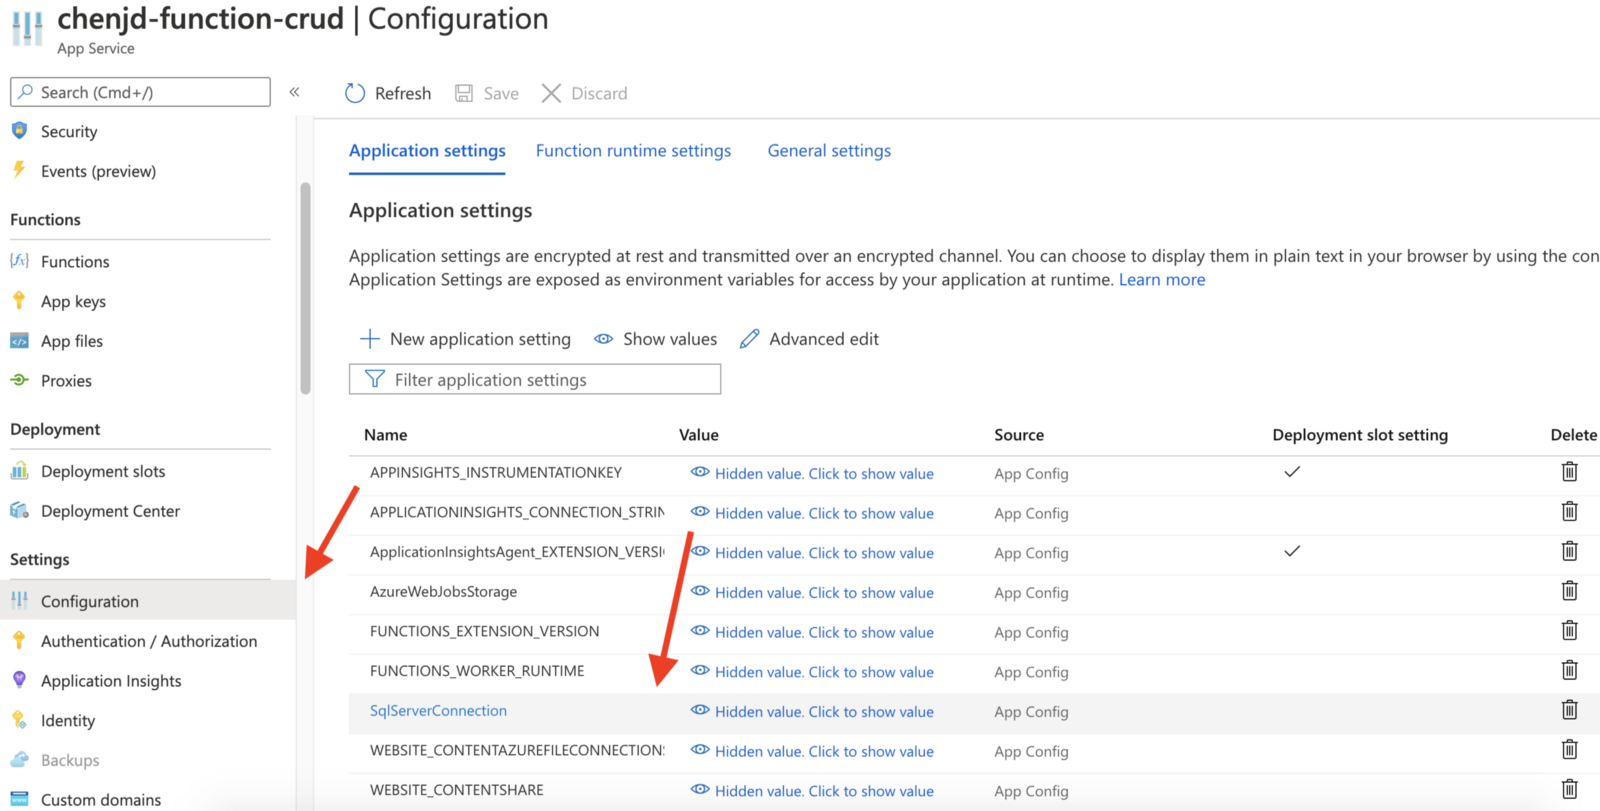
However, if we want to push our function app to the Azure cloud for public access, we must set the connection string in the Azure Function App page on Azure Cloud.
Because we use GetEnvironmentVariable in our code to get the connection string from settings. In both local and Azure environments, GetEnvironmentVariable("<app setting name>") retrieves the value of the named app setting. Therefore, we can set it in the Application Settings section in the Settings/Configuration panel.
You can try a simple API here: http://api.jiadongchen.com/api/list
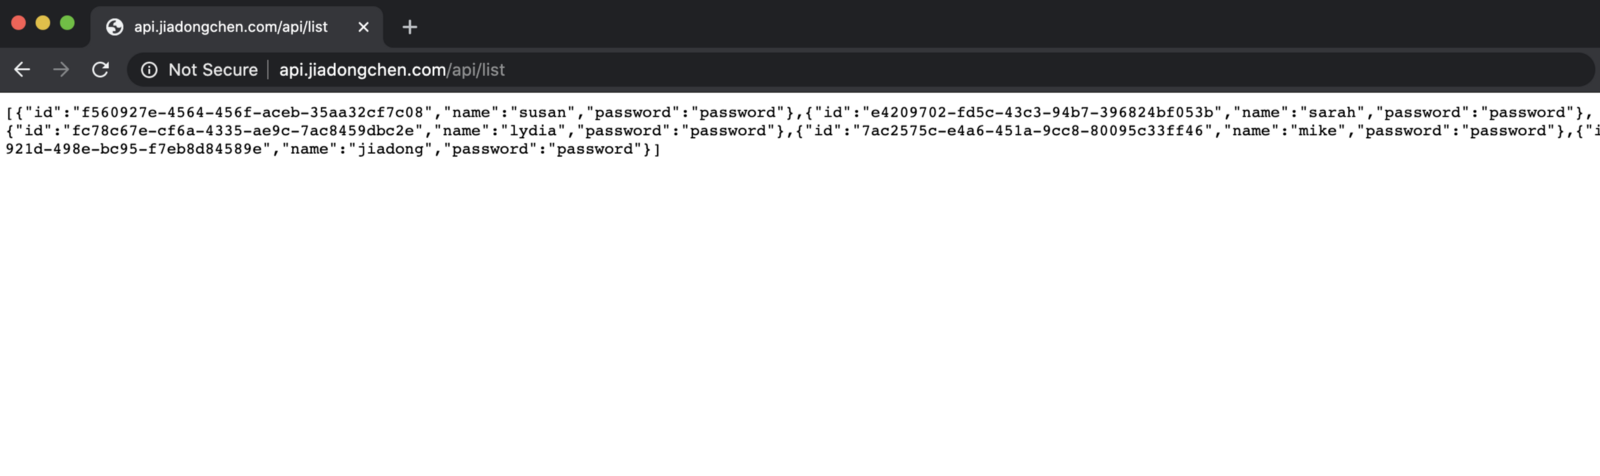
Since it is only used for demonstration purposes, the service plan selected has Cold Start issue which means after the function app has been idle for a number of minutes, the next request may have a added latency of scaling from zero to one. So stay patient.
And the sample project can be found here: https://github.com/chenjd/AzureFunction.UserCRUD
Thanks for reading and hope it’s helpful! Have a chat at https://www.linkedin.com/in/chenjd/